
Find the where
How to find a historical photo’s location.
Move from broad geography to the shape of a street, then check the viewpoint. A good map pin needs more than a familiar-looking landmark.
Combine readable signs with terrain and street geometry. Use a landmark to identify a candidate area, then compare nearby roads, water and buildings. Finally ask where the photographer was looking from: the camera, the visible subject and a city’s center can be different places.
Make a shortlist before zooming all the way in
First describe the setting: a flat port, a steep inland city, a river crossing or a wide ceremonial avenue. Then look for writing. A complete street name is usually more discriminating than a script or language shared across many countries. Read only the letters that are actually legible.
Architecture and vegetation help test a location, but they rarely prove it alone. Building styles travel; imported plants grow in parks; a familiar vehicle may have been exported. Prefer a candidate that fits several different kinds of evidence.
Keep one competing location in mind. A useful question is, “What would I expect to see here if my first idea were right?” A river on the wrong side of an avenue can rule out a plausible-looking match.
Match relationships, not just individual objects
Think of the scene as a simple diagram. A bridge crosses a river; a station sits beside a fork in the roads; a monument closes the view down a straight avenue. Those relationships are often more distinctive than a single tower.
Find one stable anchor.
A coastline, major river, hill or recognizable landmark gives the map search a starting point.
Look for a second anchor.
Check the position of a neighboring road, square or waterway relative to the first. Do they fit the photograph together?
Check the viewing direction.
If a monument is ahead and a river is to the right, the candidate viewpoint needs to make both relationships possible. Distance and perspective can compress a scene, so avoid treating apparent image size as an exact measurement.
Worked example: an avenue in Paris
This is an already-public introduction photograph. The lesson is how to reason about the scene; its location is intentionally revealed here.
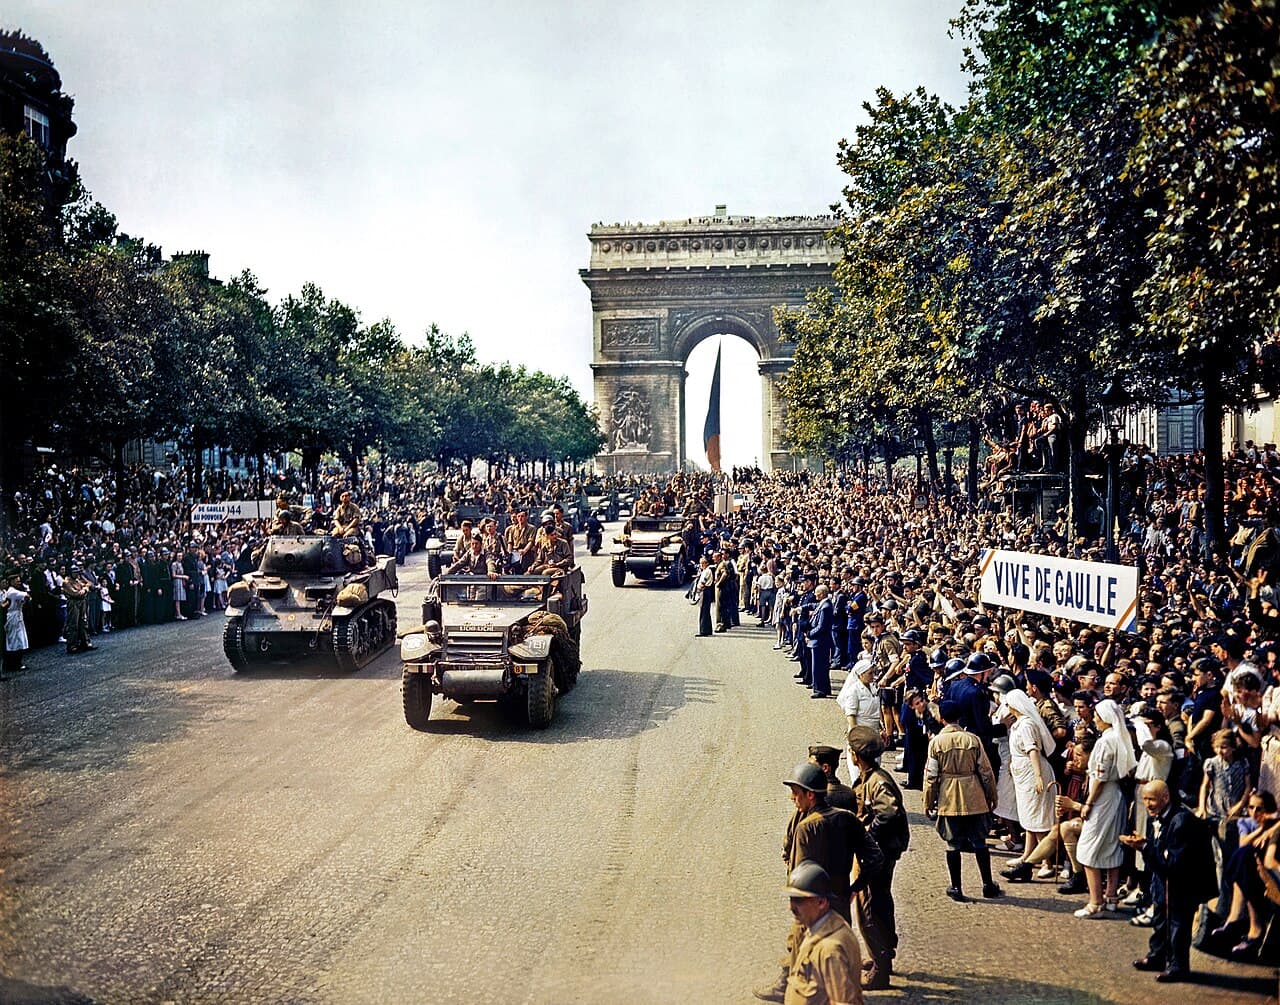

The Arc de Triomphe is the first strong anchor. But the photograph also shows a long, straight avenue leading toward it, tree-lined sides and a procession between crowds. Matching the avenue’s axis gives more support for the Champs-Élysées than simply selecting Paris.
Notice the viewpoint: we can see the front of the approaching vehicles and the arch behind them. The camera is looking toward the monument from the avenue; it is not necessarily standing at the monument’s center. The Library of Congress record identifies the scene as the Champs-Élysées. The display-copy record supplies additional location information.
In another photograph, a famous building could be visible across a river or from a distant hill. Recognizing it would narrow the search, while the water or hill would help explain the camera’s relationship to it. That is why recognizing a city and identifying a photo’s site are separate steps.
A modern map will not match every historical detail
Roads are rerouted, stations move and waterfronts change. A missing building is a reason to investigate, not an automatic reason to reject an otherwise strong location. Start with larger geographic relationships, then consider what may have changed between the photo and the map.
For research outside a game, compare dated maps and archive captions, checking that they describe the same place and time. During a round, work from the visible evidence and revisit the source after submitting. A street name alone may also be reused in several towns, so always check the surrounding scene.
Place a deliberate pin, then learn from the result
Zoom until you can distinguish the relevant site, then place or move your pin. With keyboard controls, pan the map and choose Place pin at center. On a phone, the Where and When controls let you work on the answers while keeping the photograph in view.
WhenWhere scores against a photo’s documented target and allowance, with alternative targets accepted where they are documented. It does not assume every photograph has a surveyed camera position. Read how location accuracy and full-credit allowances work before interpreting a small distance difference.
After the reveal, compare the relationship you used with the source record. If you identified the correct city but missed the site, save one practical lesson—such as checking the side of the river—for the next daily challenge.
Your next clue is waiting.
Five photographs. Create a free account and start exploring.